Canary Traffic Shifting
By using canary traffic shifting, you can evaluate a portion of your API traffic on the new upstream, while the old upstream continues to handle the rest of the traffic. This testing phase acts as a safety measure, confirming the new functionality before transitioning all traffic to it.
This differs from a canary release since the route remains unchanged and the API stays the same.
Prerequisites
- Obtain a User Account with Super Admin or API Provider Role.
- Complete Add Service from API Definition.
- Canary traffic shifting cannot be applied to individual routes. Canary rules affect all routes in the service.
Shift Traffic to New Canary Upstream Based on Percentage
In this tutorial, you will direct 10% of random traffic to a canary upstream hosted at a new server, while the remaining 90% of traffic will continue to flow to the baseline upstream.
Once the testing is successfully concluded, the canary upstream will transition into the new baseline, and the old baseline upstream will be removed, completing the entire upgrade process.
- Select Services > your target service. In this tutorial, the
Swagger Petstoreservice (See Add Service from API Definition) will be used as an example. - Click Canary Rules > Start Canary.
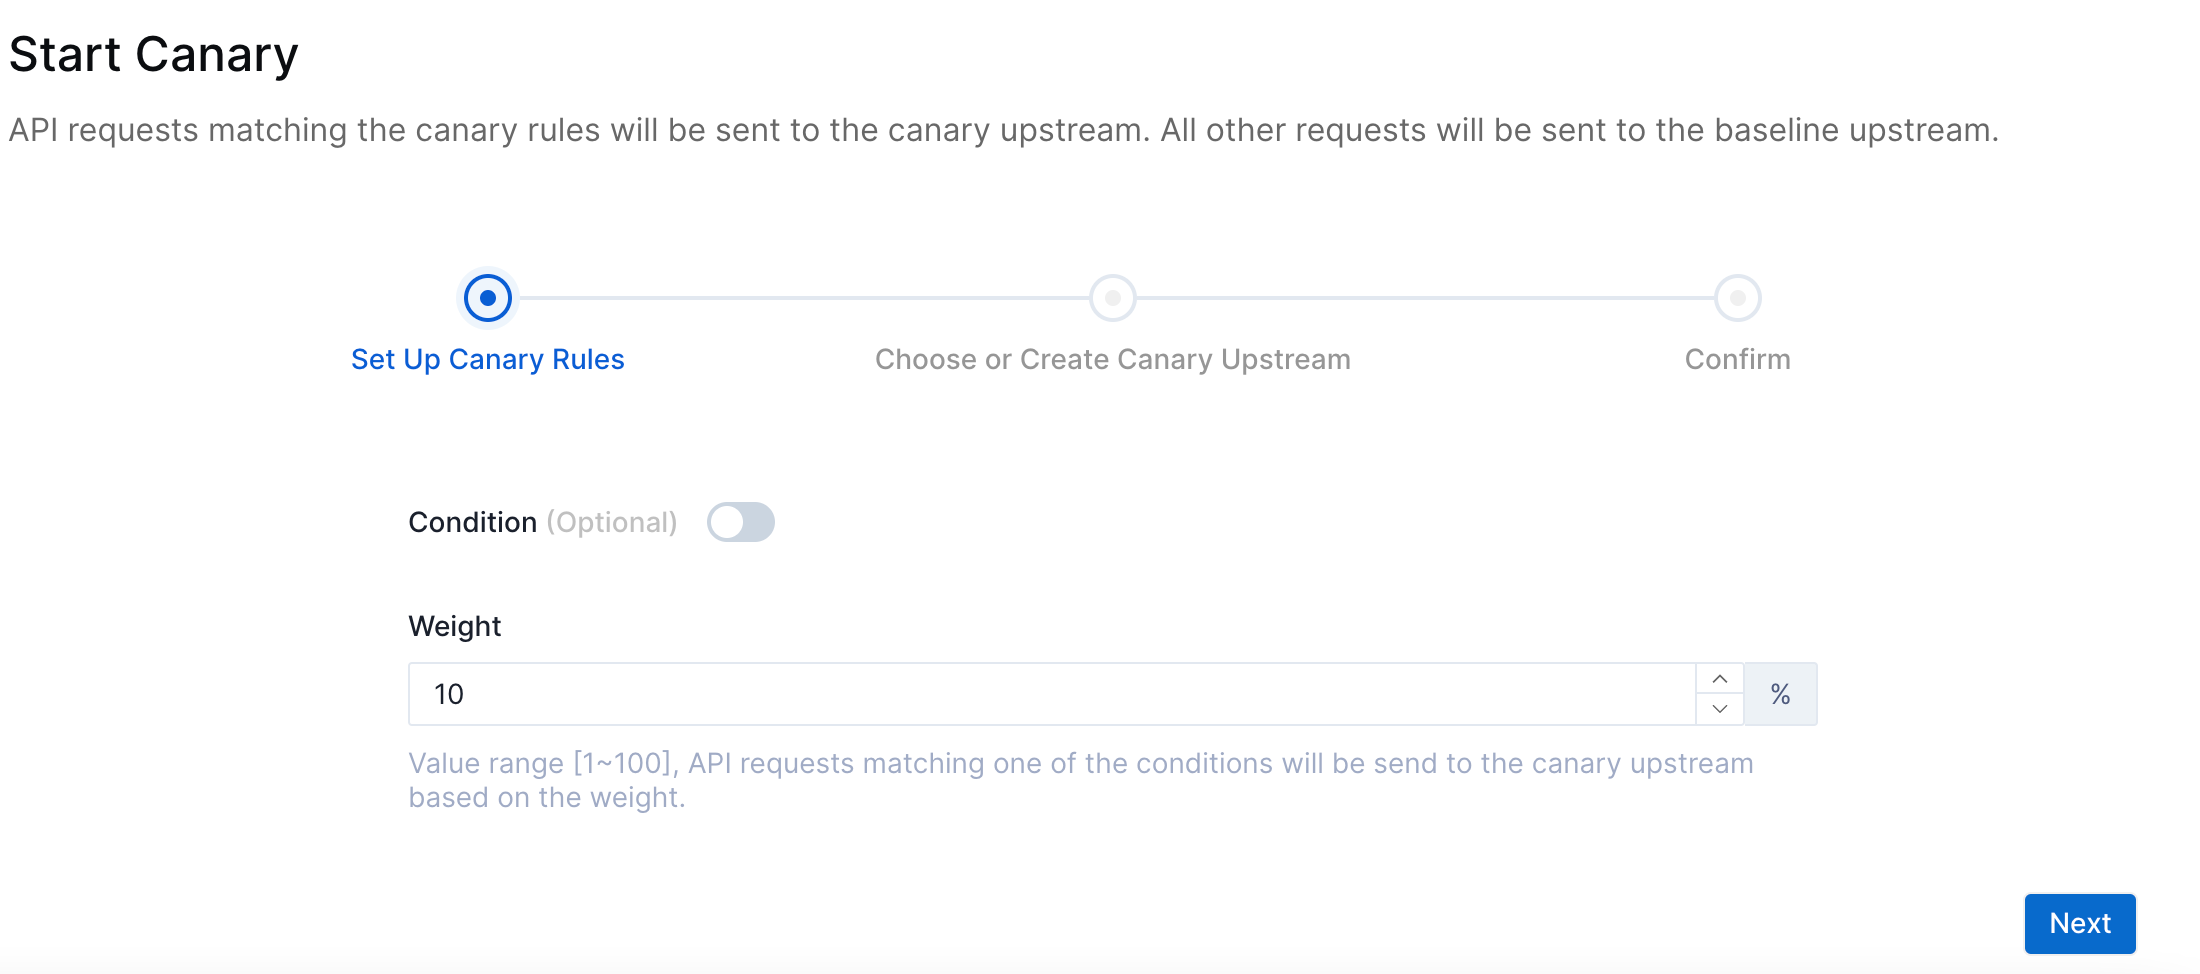
- In Set Up Canary Rules, close the Conditions switch to simply set the weight to 10%, then click Next.

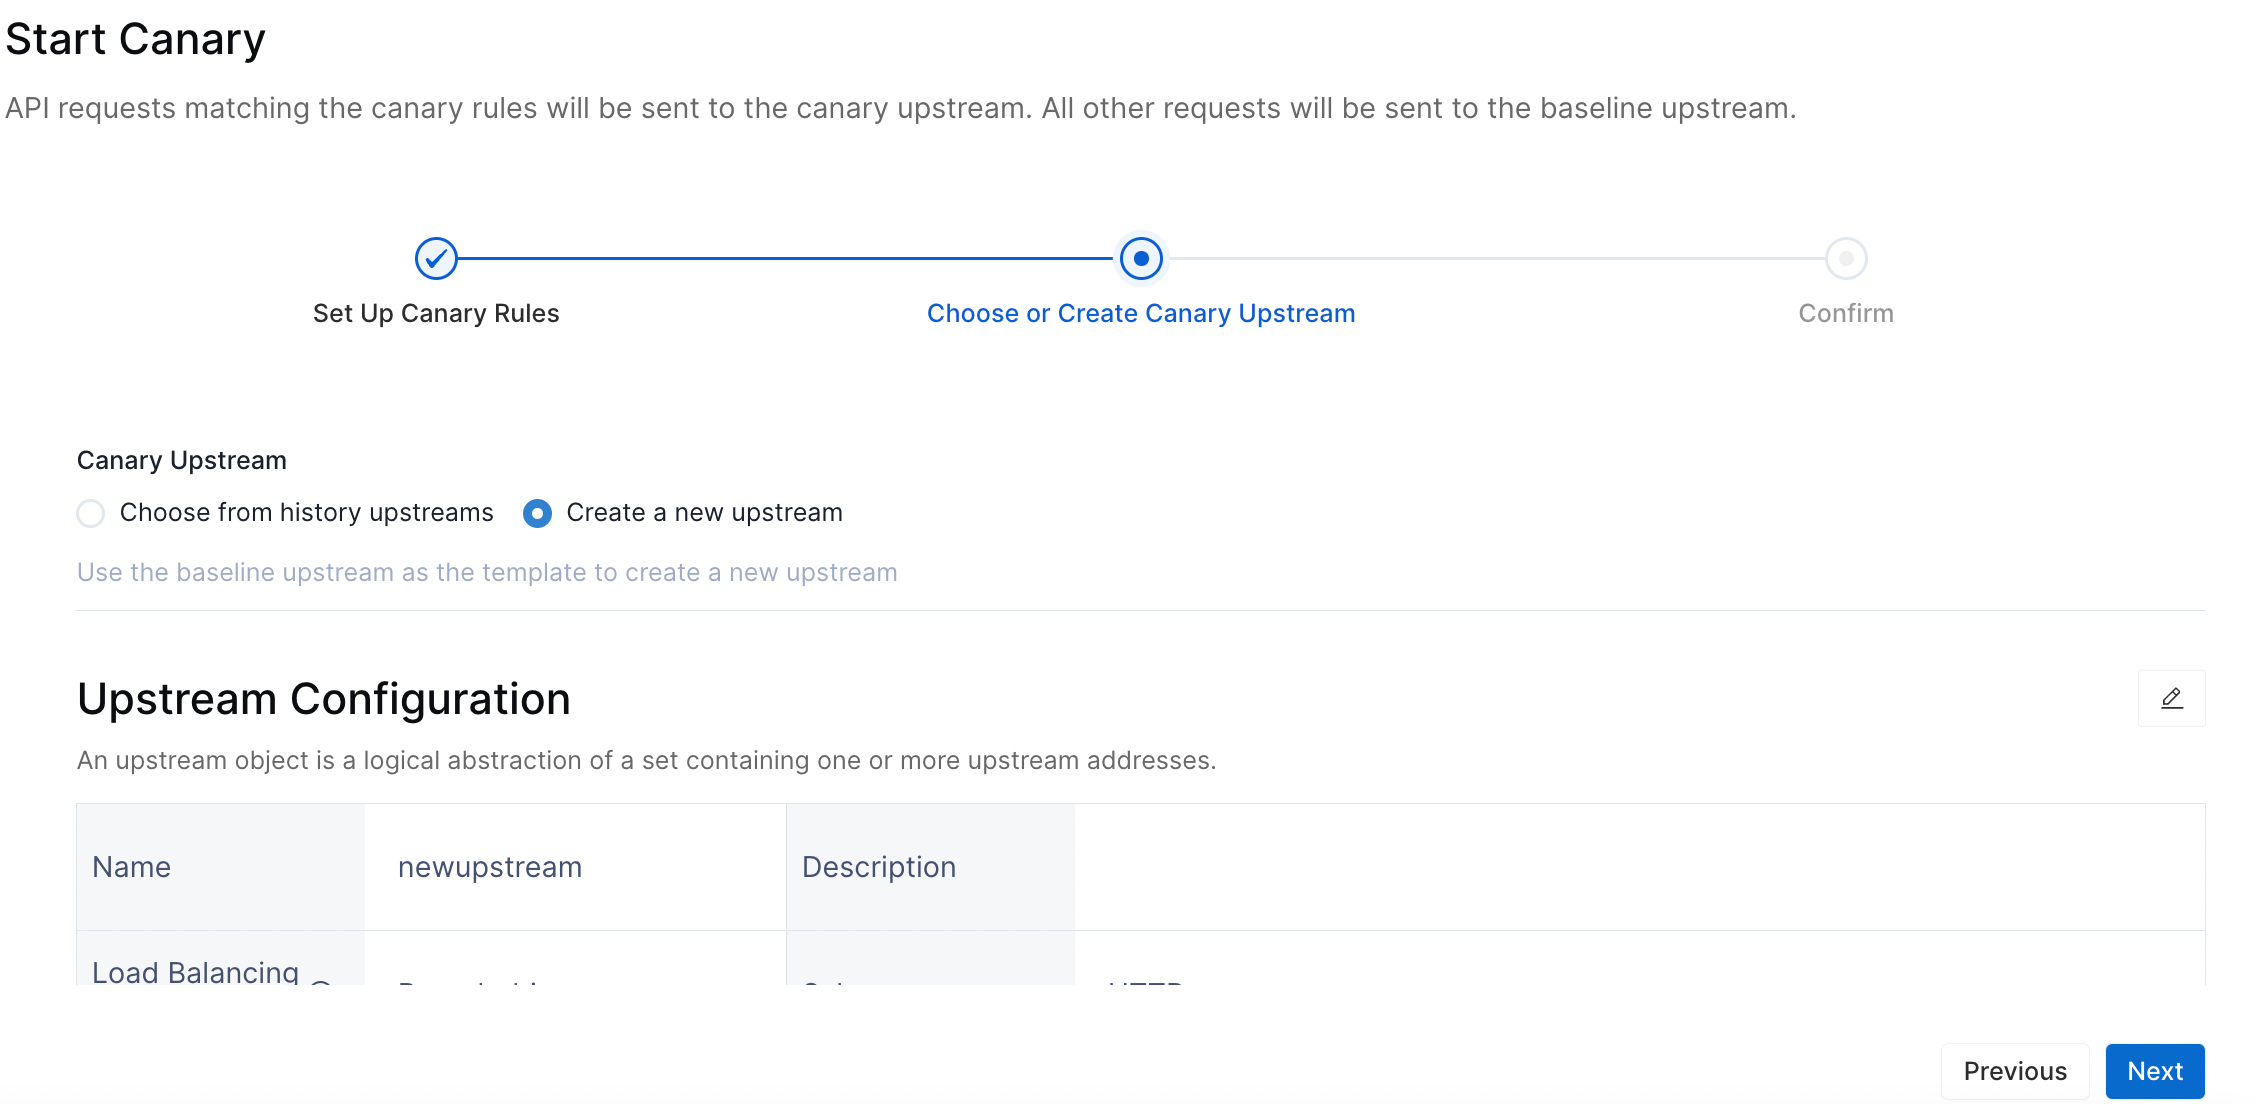
- In Choose or Create Canary Upstream, choose to create a new upstream. Modify the name of the new upstream to
newupstreamand adjust the host of the node to point to the new backend server. The rest of the properties will remain the same as the baseline upstream. Then click Next.
- Confirm your information and click Start. Your canary rules will affect immediately.
- Make API requests for testing. Loop request API 10 times:
for i in {1..5}; do curl 127.0.0.1:9080/pet/1; done
Response to 9 requests:
HTTP/1.1 200 OK

{
  "name": "Dog",
  "photoUrls": [
    "https://example.com/dog-1.jpg",
    "https://example.com/dog-2.jpg"
  ],
  "id": 1,
  "category": {
    "id": 1,
    "name": "pets"
  },
  "tags": [
    {
      "id": 1,
      "name": "friendly"
    },
    {
      "id": 2,
      "name": "smart"
    }
  ],
  "status": "available"
}
Response to 1 request:
HTTP/1.1 200 OK

{
  "name": "TestDog on new upstream",
  "photoUrls": [
    "https://example.com/dog-1.jpg",
    "https://example.com/dog-2.jpg"
  ],
  "id": 1,
  "category": {
    "id": 1,
    "name": "pets"
  },
  "tags": [
    {
      "id": 1,
      "name": "friendly"
    },
    {
      "id": 2,
      "name": "smart"
    }
  ],
  "status": "available"
}
- Click Canary Rules > Edit.
- Adjust the weight to 50%, then proceed to click the Edit button. Thus will allocate a greater portion of the traffic to the canary upstream. Make more API requests to test the canary upstream.
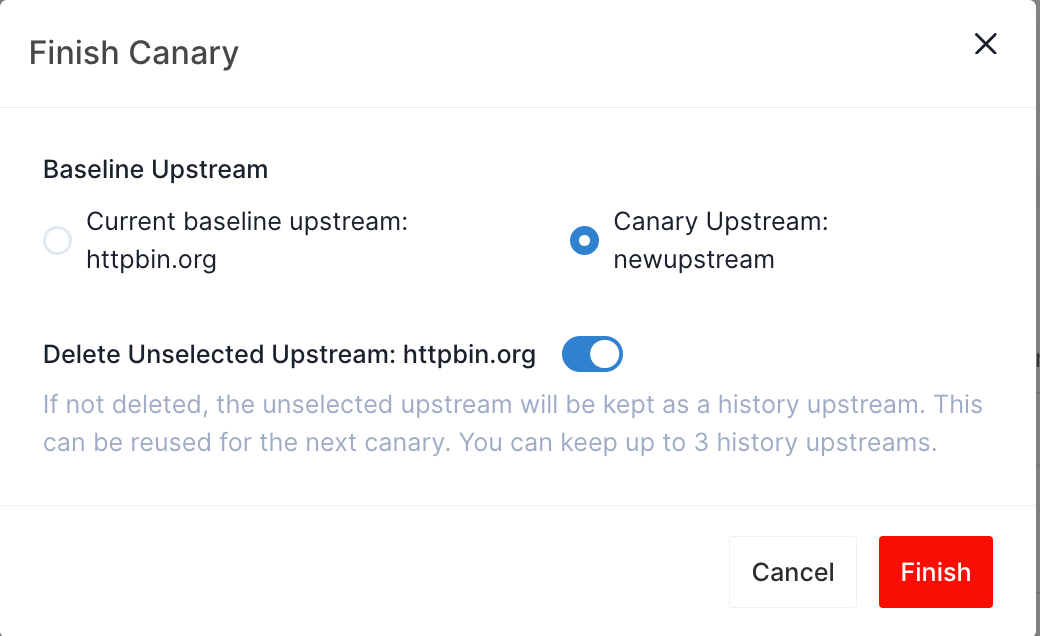
- Click Canary Rules > Finish. Choose the canary upstream as the new baseline upstream and delete the old baseline upstream.

Shift Traffic to New Canary Upstream Based on Request Header
In this tutorial, you will direct an API request with the header "version = test" to a canary upstream, while the remaining traffic will continue to flow to the baseline upstream.
Once the testing is successfully concluded, the canary upstream will transition into the new baseline, and the old baseline upstream will be removed, completing the entire upgrade process.
- Select Services > your target service. In this tutorial, the
Swagger Petstoreservice (See Add Service from API Definition) will be used as an example. - Click Canary Rules > Start Canary.
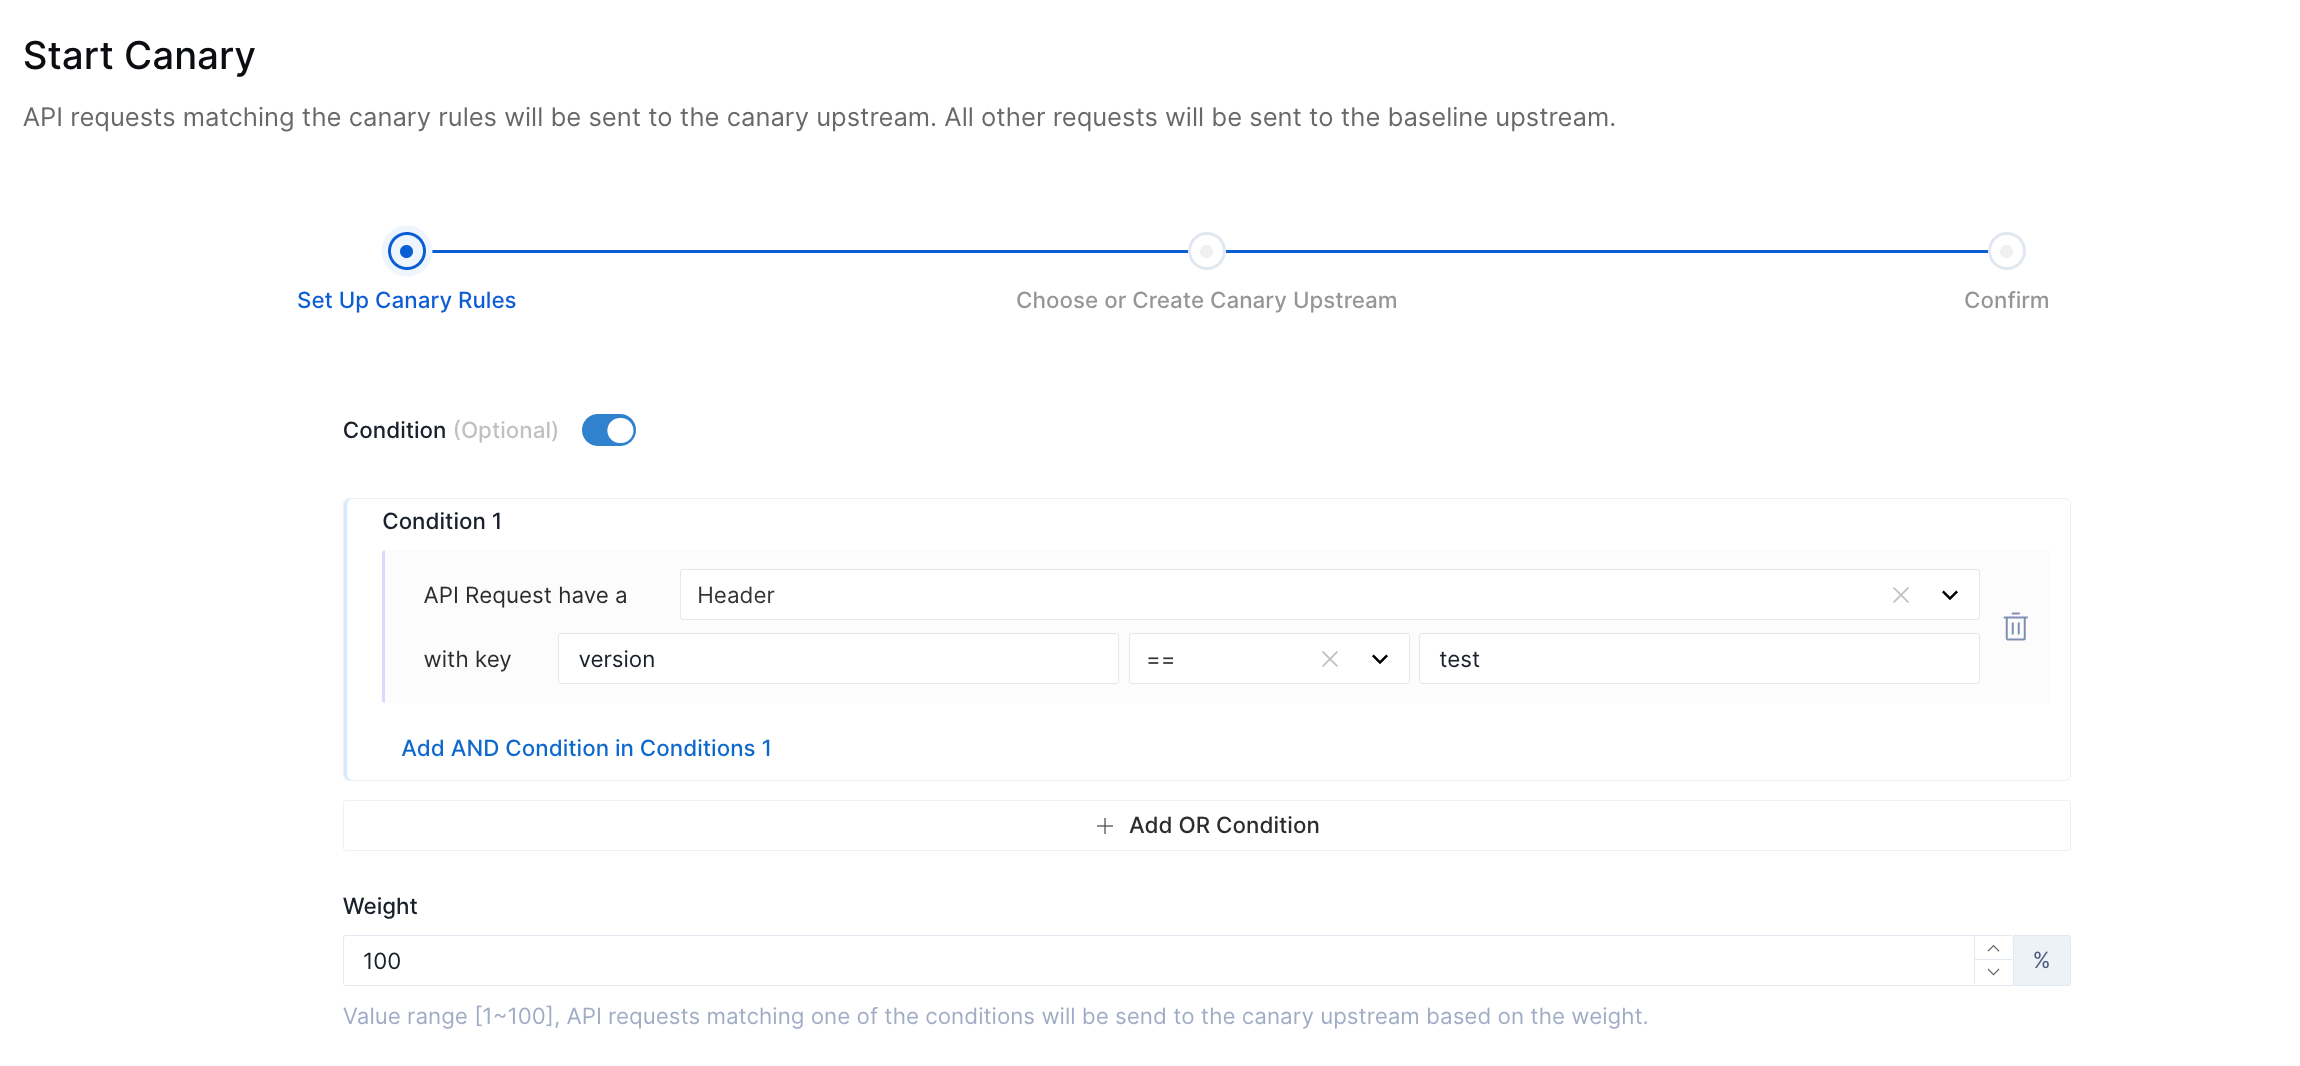
- In Set Up Canary Rules, open the conditions switch to fill in the header requirement, then set weight to 100%, means that all API requests with the specific header definitely flow to the canary upstream. Click Next.

- In Choose or Create Canary Upstream, choose to create a new upstream. Modify the name of the new upstream to
new upstreamand adjust the host of the node. The rest of the properties will remain the same as the baseline upstream. Then click Next.
- Confirm your information and click Start. Your canary rules will be affected immediately.
- Make API requests for testing.
Response to requests with the correct header:
curl 127.0.0.1:9080/pet/1 -H "version:test"
HTTP/1.1 200 OK

{
  "name": "TestDog on new upstream",
  "photoUrls": [
    "https://example.com/dog-1.jpg",
    "https://example.com/dog-2.jpg"
  ],
  "id": 1,
  "category": {
    "id": 1,
    "name": "pets"
  },
  "tags": [
    {
      "id": 1,
      "name": "friendly"
    },
    {
      "id": 2,
      "name": "smart"
    }
  ],
  "status": "available"
}
Response to requests with wrong header:
curl 127.0.0.1:9080/pet/1 -H "version:new"
HTTP/1.1 200 OK

{
  "name": "Dog",
  "photoUrls": [
    "https://example.com/dog-1.jpg",
    "https://example.com/dog-2.jpg"
  ],
  "id": 1,
  "category": {
    "id": 1,
    "name": "pets"
  },
  "tags": [
    {
      "id": 1,
      "name": "friendly"
    },
    {
      "id": 2,
      "name": "smart"
    }
  ],
  "status": "available"
}
Response to requests without header:
curl 127.0.0.1:9080/pet/1
HTTP/1.1 200 OK

{
  "name": "Dog",
  "photoUrls": [
    "https://example.com/dog-1.jpg",
    "https://example.com/dog-2.jpg"
  ],
  "id": 1,
  "category": {
    "id": 1,
    "name": "pets"
  },
  "tags": [
    {
      "id": 1,
      "name": "friendly"
    },
    {
      "id": 2,
      "name": "smart"
    }
  ],
  "status": "available"
}
- Click Canary Rules > Finish. Choose the canary upstream as the new baseline upstream and delete the old baseline upstream.
